Keep it simple…follow some basic steps…let them sleep…greet them in the spring!
Plant between Thanksgiving and mid-November here in the Highlands
Our growing season is not long and therefore by planting in the fall, roots are given a chance to develop before the cloves go to sleep in the freezing soil. As the soil warms in the spring, the clove, still cold, is stimulated to sprout and develop into a bulb. Since the roots have already started in the previous fall, the cloves get a head start on the new growing season.
Site
- A sunny location (8 to 10 hrs)
- Loose crumbly soil so the roots can penetrate deep for the nutrients and water.
Soil prep
- Work year old manure or compost into the top 4 to 5 inches of the planting bed.
- Raised beds are preferable, 3 to 4’ wide for easy access from either side of the bed.
- Length of the bed will depend on your space and how much you wish to harvest.
Planting
- Source fresh, local garlic for planting. It will be primed to Haliburton’s growing conditions.
- Separate the cloves from the stem, protecting the root base, so each clove has a root base for new growth.
TIPS UP! Always!
- Plant in holes or trench prepared 4” deep – 6” apart
- Cover and tamp down gently to bring soil into contact with cloves.
- After a good frost and before the ground freezes, it is recommended to apply a mulch of 6” to the planted garlic bed. Spoiled hay, straw or chopped up leaves can be used to cover and protect the cloves from heaving and cold weather damage.


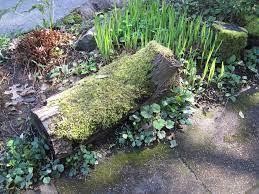
 Master Gardener Carolyn Langdon advises you to build a small rain garden at the top of your slope. Add a small berm at the top of and/or mid-way down your slope. Put in a berm of logs, branches, soil and/or rocks to slow down the water running off and to allow time for the rain to absorb and for plant roots to establish. The idea is to place any material that will act to obstruct or slow down the path of water. Organic material has the additional benefit of providing texture and nutrients to your soil as it breaks down.