• Skip to primary navigation
  • Skip to main content

Haliburton County Master Gardeners

Gardening in Haliburton County

sign up
site search
  • Ask a Question
    • MG Questions Answered
  • Request a Consult
  • Resources
    • Garden with Nature
      • For Your Property Including Shorelines
      • Go Wild
      • Invasives
      • Native Plants & Native Shorelines
      • Sunny Sites
      • Trees
      • Woodland
    • Gardening for Guilty Pleasure
      • Perennials
      • Planning and Design
    • Growing Food
      • Fruits
      • Herbs
      • Native Edibles
      • Pruning and Other Practices
      • Vegetables
      • Soil
    • Native Plants
      • Selection of Native Plants for the Highlands
    • Zone 4 Challenges
      • Pests
      • Tips
      • Wildlife
    • Useful Links
      • Canoe Radio Podcasts
      • County Life Magazine
      • MGOI Website
      • Videos
  • Guidebook
  • About
    • How to Become a Master Gardener
  • What’s On
    • Events Calendar
    • Butterflyway Project
    • Stepping into Nature
  • Buy Local
  • Contact
  • Facebook logo
  • YouTube logo
  • Printer icon graphic

Herbs

Crop Rotation

January 25, 2024

Garden Carrots

Crop Rotation is not just for Farmers

You are what you eat! In this day and age when increasing attention is paid to the quality of the food we eat, more and more people want to grow their own food. As a hallmark for sustainable farming, crop rotation minimizes problems down the road while preserving soil structure and health.

Crop rotation is not just for the farmers. It can be put to use in small plots of land as well. By rotating crops each season; we promote a natural method of pest control which helps to break disease cycles that can occur when the same crop is grown in the same spot for successive years. For example, Clubroot is a soil borne fungus that affects brassicas, and accumulates from successive growth in the same location. Mono cropping also depletes the soil of nutrients specific to that crop. In the same way our bodies can ache if we do the same thing over and over, the soil can get tired if we plant the same vegetable, year after year in the same spot.

Simply put, crop rotation requires you to avoid growing the same crop in the same spot year after year. Plant your like family vegetables in a different spot than the previous year and rotate your different crops like a cycle. It’s helpful that some vegetables will replenish lost nutrients back to the soil after a crop has been harvested. It helps to grow legumes after heavy feeders like corn or leafy vegetables. While you’re at it, add in some green manure like clover to enrich the soil. No matter what vegetables you are growing, there are many rotations to suit your needs. You decide!

Remember that any crop rotation is a work in progress, and much of the enjoyment and challenge comes from experimenting with it each year as you learn from previous years. By keeping in mind a few things, it will make it much easier to work out a suitable rotation for you.

  • Know botanical names of your vegetables and group vegetables from the same family together
  • Explore the internet as  there are a wealth of resources 
  • Keep a notebook to record observations and keep accurate records 
  • Grow green manure as it enriches the soil like essential nutrients for the body
  • Alternate deep rooted and shallow rooted crops to promote a balanced draw
  • Leafy vegetables generally use a lot of nitrogen so plant soil builders like beans prior to growing lettuce

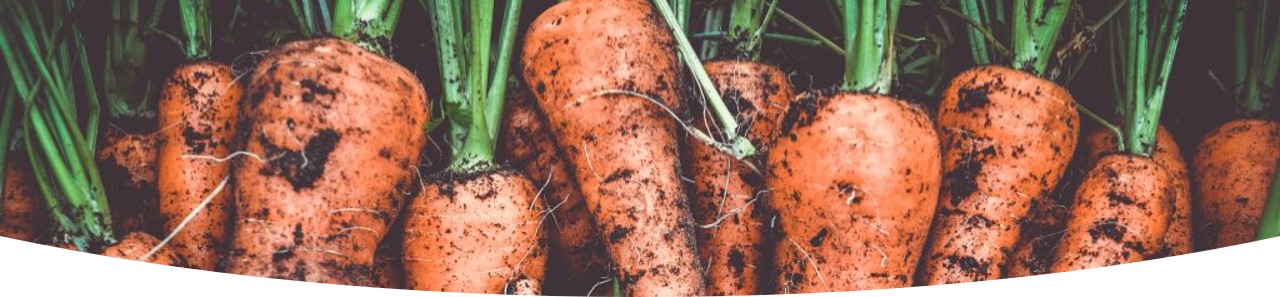
Some basic types of groupings that may work for you include: heavy feeders (broccoli, lettuce, tomatoes, eggplant, corn, squash); light feeders (carrots, turnips, sweet potatoes, peppers, garlic, onions, chives); nitrogen fixing (soil builders – green beans, lima beans, peas, soybeans); green manures (clover, vetch, alfalfa, rye, buckwheat).

Article written by Shane Rajapakse for the MGOI newsletter and reprinted here with permission.

Editor’s Note:  More gardeners are practicing a technique called chop and drop. Essentially you cut back your weeds and grasses before they go to seed and leave them on your garden as green manure mulch.  The nutrients are available immediately to the plants and the mulch helps the soil to retain moisture, repress weeds and improve soil structure.


Filed Under: Fruits, Garden with Nature, Growing Food, Herbs, Pruning and Other Practices

Container Gardening

December 15, 2021

Container Garden – Patio Planter

Even the smallest of spaces can enjoy the beauty of flowers or vegetables in well arranged containers. Container gardening is about more than just filling a pot with a few plants. It is about art in your garden, on your deck, on your balcony. It is about understanding and using plant knowledge and applying design concepts to create an attractive, sophisticated garden in a container. By considering composition using colour, form, and texture – containers can provide season long interest to any patio, deck and balcony or even those hard to fill spaces in the garden.

The Container

Choosing the container is as important as choosing the plants. I have selected an English style terra-cotta planter that is 24” wide at the top and narrows to 18” at the base. The container is 18” deep. The pot has five holes in the bottom to promote drainage. The choice of this pot means that more care will be required to maintain the health of the plants. Clay dries out more quickly as water evaporates more easily than from plastic or fiberglass containers and require more work to store during the winter months. However, I felt the beauty of the pot over-rides the above concerns.

The Media

The media I have chosen is Miracle-Gro potting mix with a enough available nutrients to get the plants started. I have used this media in the past with great success. The choice of a potting mix verses garden soil was made for a number of reasons. Soil does not drain well in containers. This leaves the potential of roots becoming soggy, reducing the oxygen availability to the roots and the decline in the health of the plant. Potting mixes are sterilized to kill weeds seeds and pathogens, are generally pH balanced and have a small amount of nutrients available to young plants.

I have chosen to cover the drainage holes with pot shards. The use of gravel, which we often learned from our mothers was the appropriate thing to do, raises the water table of the pot, leading again to the problem of soggy roots and soil borne diseases. By choosing to cover the holes in this way, the water table of the pot is equal to the bottom of the pot. If desired, one could cover the holes with polystyrene packing peanuts enclosed in clean, onion netting. This serves the dual purpose of containing the soil in the pot and lightening this heavy terra-cotta planter.

To mitigate dryness due to evaporation from the clay pot, water-absorbing polymers were added to the soil mix. When wet, these polymers hold up to 200 times their weight in water. As the growing medium dries out, the polymers release the water for plant use. This will help reduce the watering needs of the container, however it is important to check the planters daily for watering and disease or insect infestation.

Another amendment to the media is slow release fertilizer in the ratio of 1:2:2. Once the media is moist and the fertilizer has absorbed some water, soil temperature is the only factor that affects the long term release of the nutrients. The label on the fertilizer should inform the gardener of the ideal release temperature. Temperatures above the ideal will release the fertilizer more quickly and temperatures below the ideal will release the fertilizer more slowly than what is documented on the label. Apply the fertilizer to the media at the recommended rate for the size of the pot. Using a water-soluble fertilizer after the first three or four months may be needed to keep containers healthy and beautiful.

Water is added to the potting mix to moisten the soil after the water-absorbing polymers and slow release fertilizer are added and before planting. Potting mix can be quite dry coming out of the bag. Water is added and mixed in to the media and let sit for one or two hours for full absorption.

The Design

For the design, plants enjoying similar growing conditions are selected based on colour, shape and texture. In terms of colour, analogous colours of yellow and orange that are next to each other on the colour wheel (see image right) are chosen with a splash of contrast to add some drama. Colours include the harmonious hues of yellow rudbeckia and margarita daisy that with the orange canna flowers contrast with the dark purple leaves of sweet potato vine and the burgundy canna lily leaves. The ornamental grass with its finely textured green leaves and soft tan-coloured plumes adds texture to the appearance.

In addition to the design principals outlined above, another key component to designing planters are what have become to be known as thrillers, fillers and spillers. The thriller is the focal point of the container that draws the eye and adds height. Fillers make up the mid container space without distracting from the focal point. Spillers are cascading plants that flow over the edge of the container and fill the spaces left after planting the fillers. Plants with different or long blooming periods or that display distinctive foliage, some of which may change colour with the onset of fall, provides interest over the season.

After filling the container to about two thirds full with media, arrange the plants as per the design. The largest plant – the Canna – will be planted first, followed by the grass and then the filler and spiller plants using the remaining media. Fill the container with the pre-moistened media to approximately 2.5 cm below the edge of the pot for water catchment. As with the garden, plants should be planted no deeper than they are in the original pot.

The plants include the following list with the Canna planted at the far edge of the container and the fountain grass beside it. The Marguerite daisies are planted next is a semi circle around the specimen plants followed by the geraniums between and in front of the daisies. The sweet potato vine is planted last and position such that it spills over the edge.

A: Canna ‘Tropicanna’ (Tropicanna Canna) – 1 plant

B: Pennisetum alopecuriodes ‘Hameln’ (Dwarf Fountain Grass) – 1 plant

C: Argyranthemum frutescens ‘Butterfly’ (Marguerite Daisy) – 3 plants

D: Pelargonium ‘Blood Red’ (Blood Red Geranium) – 3 plants

E: Ipomoea batalas ‘Blackie’ (Sweet Potato Vine) – 3 plants

The Thrillers

It is important to consider the perspective or angle of view when planting the container. In this instance the thrillers are placed close to the back of the planter and slightly off centre as the angle of view is about 280 degrees.

Pennisetum alopecuriodes ‘Hameln’ (Dwarf Fountain Grass) has been selected as the focal point (image right). This specimen is considered an annual in Haliburton although it is hardy to CDA zone 5 and some sites indicate it is cold hardy to zone 4. It is a fine textured arching grass with green leaves and mid-summer tan-coloured blooms. In full sun and moist, well-drained soil it will grow to about 80-90 cm (32-36”) tall.

Canna ‘Tropicanna’ (Tropicanna Canna Lily) will add height to the arrangement (see image right). Chosen for its broad leaves with green, burgundy, red and yellow stripes and brilliant orange flowers, this eye-catching specimen stands about 120 cm (48”) tall. As with most Cannas, this specimen prefers full sun and rich, moist soils, especially during the active growing period. For best flower development a higher potassium fertilizer in the ratio similar to the 1:2:2 added as an amendment is preferable. The rhizomes are tender and will be started indoors at the beginning of April and transplanted to the container.

The Fillers

The filler plants include three Marguerite Daisies and three red Geraniums.

Argyranthemum frutescens ‘Butterfly’ (Marguerite Daisy ‘Butterfly). A tender perennial in zone 9, this specimen is considered an annual in Ontario. Growing to a height of 40-60 cm (16-26”), this gorgeous flower blooms late spring through to frost providing colour season over the entire season. The bright green, deeply lobed fern-like leaves are fragrant when crushed and will add a fine texture and contrast to the container. The flowers are bright yellow with golden-orange centres and complement both the geranium and canna.

Pelargonium ‘Blood Red’. An annual commonly known as geranium are used as bedding plants in Ontario. Growing to a height of about 30-50 cm (12-16”) tall, these plants prefer full sun and rich well-drained soil. Deadheading will promote blooming over the entire summer, adding rich colour to the container.

The Spillers

Ipomoea batatas ‘Blackie’ (Sweet Potato Vine ‘Blackie’) (image right). Chosen primarily for its foliage, this plant has stunning purple leaves that spill over the edges of the container trailing up to 150 cm. It will add interest and contrast to the yellow flowers and green leaves of the filler plants. Like the other container plants, sweet potato vine does well in full to part sun and moist, well drained soil.

Maintenance

This container will need to be checked daily for watering needs although the water-absorbing polymers will keep the plants moist for a period of time. Morning watering is best so that plant leaves have an opportunity to dry during the day thereby helping to avoid any disease problems. Even in seasons with high rainfalls, containers still need to be watered as rarely is enough rain absorbed to meet the plants needs. Water when the soil feels dry for a depth of 2.5 cm and if possible, try to avoid wetting the leaves.

Because a slow release fertilizer was mixed into the media, additional fertilizer may not be required. However with the hot summer temperatures in Ontario, the release of nutrients may be faster than anticipated. My preference is to add a water-soluble fertilizer every four weeks during periods of rapid growth and bloom period. Fertilizer applications will be reduced in the fall to ensure the perennials harden-off for the winter.

Deadheading of spent flowers will encourage continuous blooms throughout the summer and keep the arrangement looking tidy. Any damaged or diseased stems will need to be pruned out and some shaping may be required. While deadheading, plants can be inspected for bugs and disease.

Slugs, snails and earwigs can be picked off or treated with a pesticide. Pelletized products work well in containers but may have to be replaced once every six weeks or so as they are water-soluble. Aphids are another common problem in container plantings and can be sprayed off with water if the infestation is mild. The use of an insecticidal soap on the undersides of leaves and on stems is also helpful.

Some of the plants in this container can be overwintered. The arrangement will be disassembled in early October so that the perennials will have an opportunity to establish themselves in the landscape before winter sets in.

The Dwarf Fountain Grass will be planted in a sheltered area of the garden to see if it will overwinter in zone four. The annuals will be discarded into the compost bin.

The Canna rhizome will require a little more care. The plant will be cut back to within 3 cm of the bulb after the first killing frost. The rhizome will be lifted, and leaving some soil around the clump, stored in a cool dry area in the basement. The rhizomes like to be moist, even when dormant. Inspect periodically and sprinkle with water if needed. Rhizomes can be divided in the spring wherever there is more than one stem.

The terra-cotta container needs to washed and dried and stored in the basement as it can freeze and crack in the cold winter weather. Prior to planting in the spring, the pot should be washed again with soap and water, rinsed and sterilized using a 10% bleach solution.

Resources

Bluestem Nursery

Canadian Gardening Magazine

Far East Plants Corporation

Heritage Perennials

Paul Zammit: The Greenhouse Grower

Plant Advice

Proven Winners

Filed Under: Fruits, Gardening for Guilty Pleasure, Growing Food, Herbs, Native Plants, Perennials, Soil

Cooking with Herbs

September 25, 2021

In our gardens, many of us have space for, or may already grow an herb garden but feel more comfortable keeping these fragrant plants outside. These delicate plants can very easily be brought into your kitchen to enrich your cooking and your lives.

Growing and cooking with fresh herbs can be an extremely rewarding experience. Not only do you have beautiful fresh herbs throughout summer and fall but if harvested and dried properly you can have a bountiful supply of herbs throughout the winter and spring months until once again your new harvest comes in the following summer. Imagine walking out to your herb garden and snipping just the right amount needed for a recipe as opposed to going to the market being forced to buy a large overly-priced container of an herb such as oregano when all you need is one or two teaspoons. That in itself is worth the effort of growing your own herbs.

A good idea is to plant only those herbs that you will cook with or use to make herbal teas, vinegars and oils. An excellent selection of herbs to start with would be basil, chives, cilantro, dill weed, fennel, mint, oregano, parsley, rosemary, sage, sweet marjoram, tarragon, and lemon thyme. Many aromatic herbs such as mint, parsley, sage and rosemary tend to repel certain insects therefore making valuable garden companions for vulnerable plants. Dill, balm, and thyme are some of the herbs that attract bees which pollinate other plants. Therefore, keep in mind companion planting when deciding on where to plant each herb. But as delicate as these herbs are, aggressive growers such as mint and oregano should be contained in pots so they do not overtake your entire garden.

Harvesting Herbs

Throughout the growing season, be sure to snip herbs regularly to encourage branching and new growth. Harvest whenever you need fresh herbs but do not cut more than one third of the stem’s length. The only exception to this would be when harvesting chives or lavender which should be cut at ground level.

Preserving Herbs

To preserve freshly cut herbs, wash thoroughly and then dry them using a salad spinner and then blot the rest of any remaining moisture with paper towels. Tie the stems together with kitchen string then hang upside down in a cool, dry area that has good ventilation. Then once the herbs are dried they should be placed in clean jars and labelled and dated. Using a dehydrator which has a heat control, will dry herbs in hours rather than days.

The three greatest dangers in storing herbs are: Excess moisture, too much light and improper sealing of container. If herbs are not properly dried after washing excess moisture left on herbs will produce mold; excessive light in the drying area will cause fading and/or loss of colour; and improper sealing of storage containers will allow insects etc. to get in and contaminate the product.

Herbal Tea

Those of us that buy herbal tea tend to forget that the fragrant plants that fill our tea bags can be harvested in our own backyard. Making your own herbal tea is a lot of fun and a total matter of preference when selecting and creating flavours. The rule of thumb for brewing tea is to use only one teaspoon of dried plant material for one cup of water. Three teaspoons of any fresh herb equals one teaspoon dried. That rule only exists until you figure out the strength of tea you prefer. So then, the perfect cup of herbal tea would be to pour one cup of boiling water over one teaspoon of dried herbs or three teaspoons of fresh herbs, wait five to eight minutes and then sit back and enjoy your tea. If you steep your tea any longer it can develop a bitter taste, and if you steep it less than five minutes you will barely get the flavour from the herb.

Herbed Vinegars

The two main considerations in making herbal vinegar is the type of vinegar to be used (examples being white vinegar, apple cider vinegar, rice vinegar, champagne vinegar, sherry vinegar etc.) and the desired flavour, dictated by the choice of herb or combination of herbs. To create flavoured vinegar simply fill a jar with chopped fresh herbs, then pour in the vinegar of your choice to cover the herbs completely. Stir the contents to release any air bubbles then cover the jar using a plastic lid. Label the jar with the date made and herbs used and type of vinegar used. Leave for two to five weeks, making sure to sample each week until the desired flavour strength is reached. At that point, decant the vinegar by straining the vinegar through a cheesecloth or coffee filter into a new clean jar or bottle and create a new label with a date and the list of contents. Unopened, the vinegar will last approximately two years but once opened it should be used within six months.

Herbal Oils

When making herbal oils, like vinegars, there is a tremendous selection of oils. The popular choice is to use sunflower or safflower oil as they have the mildest taste therefore have a minimal effect on the final product allowing the flavour of the herbs to shine. The process is quite simple. Loosely fill a jar with freshly chopped herbs then pour in enough oil to cover and fill the rest of the jar covering the herbs completely. Seal and label the jar with the date and list of contents then place in a sunny spot like a window sill for three to four weeks. For the first two weeks stir the contents every day then place back on the window sill. After the four weeks, strain through a cheese cloth and bottle the herbed oil, remembering to create a new label with the date and list of contents.

These herbed vinegars and herbal oils can be used to enhance your favourite dishes. Adding them to salad dressings or pasta sauces adds depth and a joy of knowing your garden provided these delicious flavours.

General Culinary Uses

An excellent way to use herbs during barbecue season is to cut sprigs of rosemary, oregano, marjoram, cilantro, and basil and tie them together at one end with a rubber band creating a basting brush. Then proceed to baste meats, fish and vegetable with any specific marinade using the herbal basting brush. While basting the essential oils of the herbs are released onto the food along with tiny bits of the herbs. Once the food is ready to be served, cut off the tied end of the brush (then discard) and spread the remaining sprigs of herbs onto the serving platter before plating the food. The resulting aroma and taste is exceptional.

Herbs have been used for centuries to enhance the flavour of soups and stew either by adding the herbs directly or creating a small packet of herbs tied up in cheesecloth, commonly known as a “Bouquet Garni”. This herbal bouquet is typically made up of fresh parsley, marjoram, summer savory, thyme, a bay leaf and rosemary. In French cooking a well known seasoning blend is known as “Herbs de Provence” consisting of dried winter savory, thyme, rosemary, basil, tarragon and dried lavender flowers. This herb blend is delicious when used in egg dishes such as soufflés or omelettes.

The herbs you grow can also be used in potpourris, sachets, herbal butters, or to make long lasting floral displays that scent your home well beyond the growing season. As Julia Child once said “There’s no end to imagination in the kitchen.”

Filed Under: Growing Food, Herbs

coordinator@haliburtonmastergardener.ca

privacy policy

Haliburton County Development Corporation logo


HCMG logo
Member Login
  • Ask a Question
  • Resources
  • About
  • News & Events

Follow us on YouTube badge

  • Newsletter Signup
  • Contact
  • Buy Local

© 2025 HaliburtonMasterGardener.ca   •   Website Development by TechnicalitiesPlus Inc.